Hi, friends!
Today you are in for a treat as you learn TONS of techniques during the CTMH Technique Blog Hop. You may have come from Krista’s blog but if not, no worries, this is a circular hop. So check out what I’ve got in store and then I’ll link you to Michelle’s blog at the end.
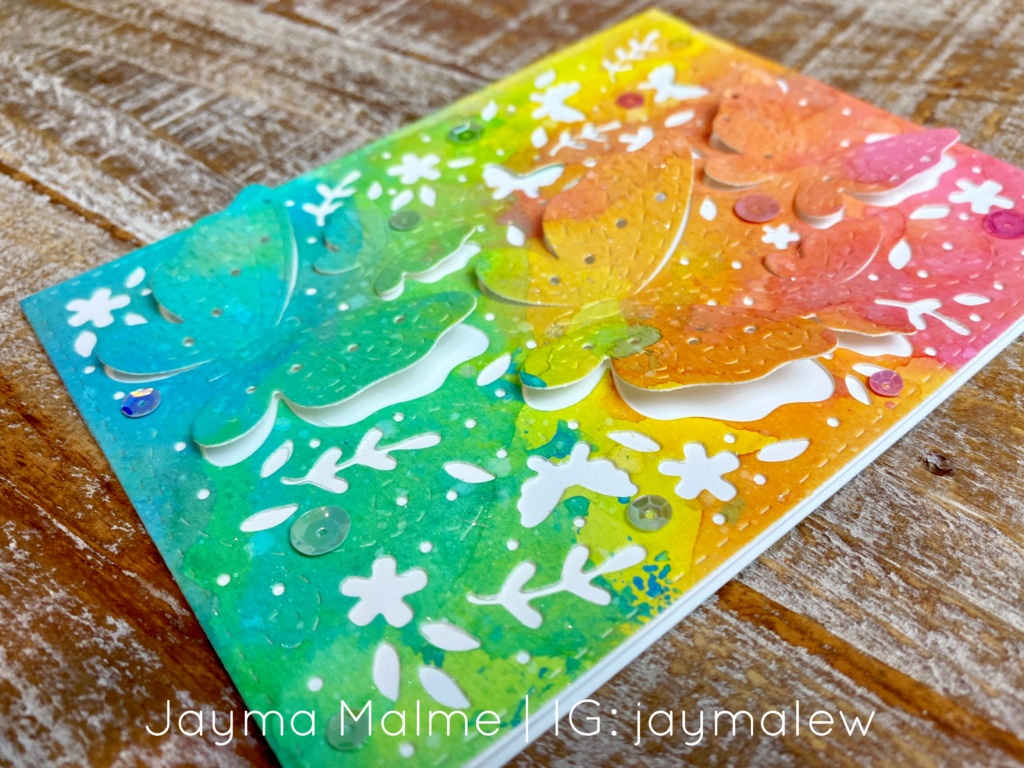
Today I’m showing you 2 ways to use Distress Oxide inks and ALSO 2 ways to use the same background die.
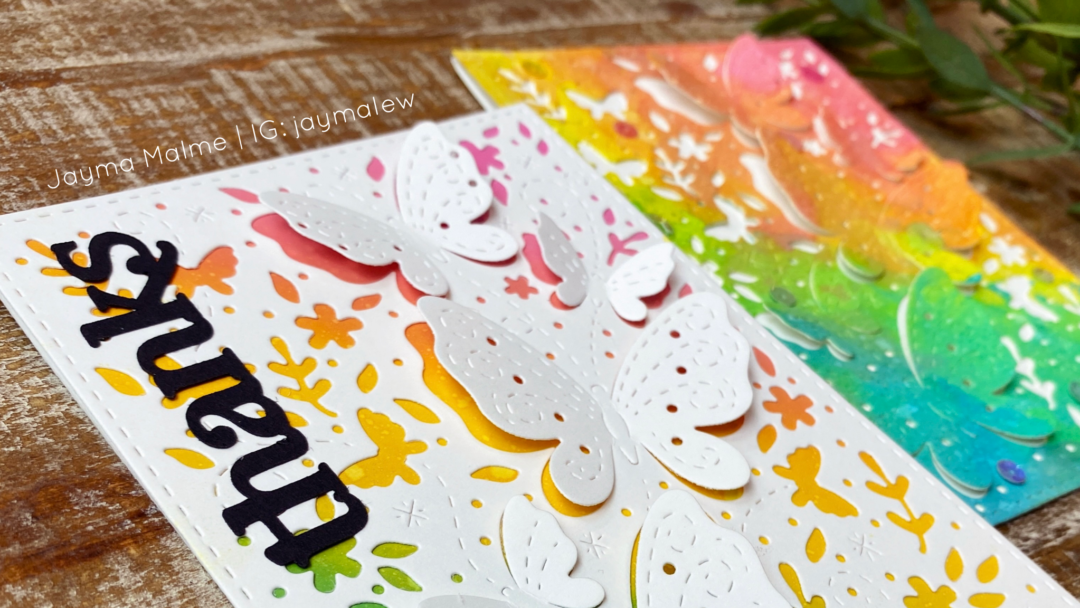
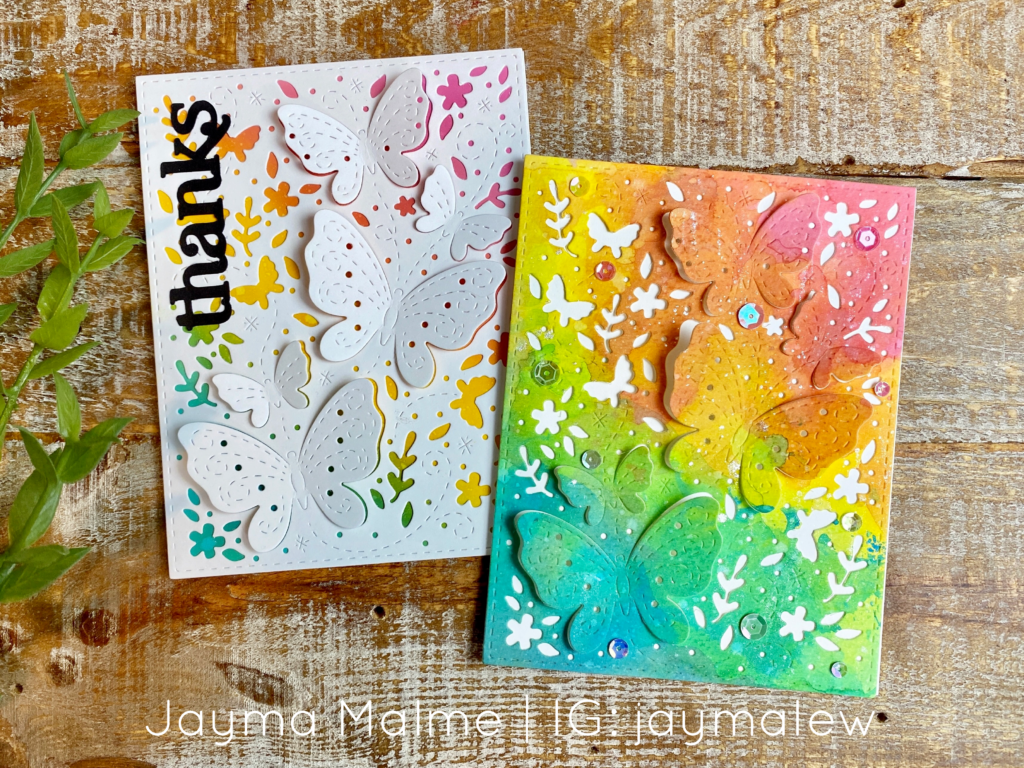
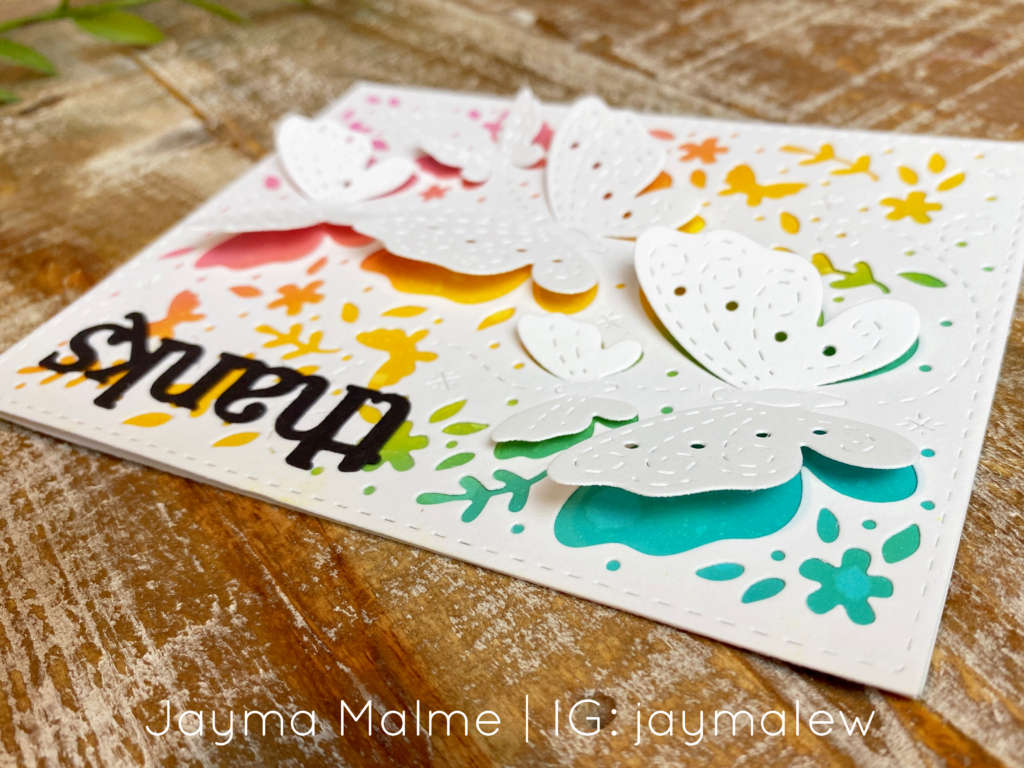
I just LOVE this amazing Butterfly Background Thin Cuts die. It makes it quick & easy to put a card together but packs some major punch! Don’t you love tools that make your life easier? 🙂
How to Achieve this Look
For both cards I blended 3 Distress Oxide inks to get a rainbow look. I used Picked Raspberry, Mustard Seed, and Peacock Feathers. This is my favorite combo for rainbow blending. The best part is, when you blend the pink and yellow you get orange…yellow and blue made green…and if you wanted to go further, you could blend the pink and blue for violet. Love to strategically make my supplies for further!
Card #1
For Card #1 I blended the background panel using foam blending tools and then sprinkled with a little water to get the oxidized drops. Then I added a white Butterfly Background die cut over the top. I was having trouble deciding on a sentiment because I didn’t want to cover much up. Who says your sentiment can’t go sideways?! I used a black Cricut-cut sentiment to make it really pop. The rainbow backdrop peeking thru just makes me smile! 😊
Card #2
For Card #2 I blended onto watercolor paper. First I wet the paper then I squished the Distress Oxides onto my All-Purpose mat and sprayed them with water to make them like watercolors. I painted them onto the watercolor paper, making sure they overlapped and blended to get the rainbow colors. Then I dried it and added more color by smooshing the watercolor panel directly into the ink that was left on my mat. I continued doing this and drying between “smooshes” until I was happy with the look. I added a few sequins in colors that matched the color they’re on top of to finish it off.
TIP: Be careful not to blend colors when wet that will become “muddy.” However, you can overlap colors that would become muddy if wet, if you’re smooshing onto a dry panel. Add as many layers as you want til you’re happy with the look!
Thank You!
I hope you enjoyed my cards today! If you did, here are all the places you can follow me for more inspiration:
SUBSCRIBE on YouTube
INSTAGRAM
FACEBOOK
PINTEREST
Now head over to Michelle’s Loncar’s blog!
Supplies
Butterfly Background Thin Cuts
Distress Oxide Inks – Picked Raspberry, Mustard Seed, Peacock Feathers
Ink Blending Tools
All-Purpose Mat
Various sequins
💗 Shop: www.JaymaMalme.ctmh.com 💗
This page may contain affiliate links. By clicking on those links and making a purchase, you are helping to support my small business at no additional cost to you. Thank you for your support!
6 Comments
These are stunning!
SO SO PRETTY; both designs! WOW! I love them and all of the color!
Both of your cards are gorgeous! So bright and pretty they just make me smile!
Distress oxides are so fun!
Love both of your cards! I love the bold sentiment on the first, I also love the almost hidden sequins on the second.
Two BEAUTIFUL cards!! This background thin cut is so beautiful too!! Thanks for inspiring!!